
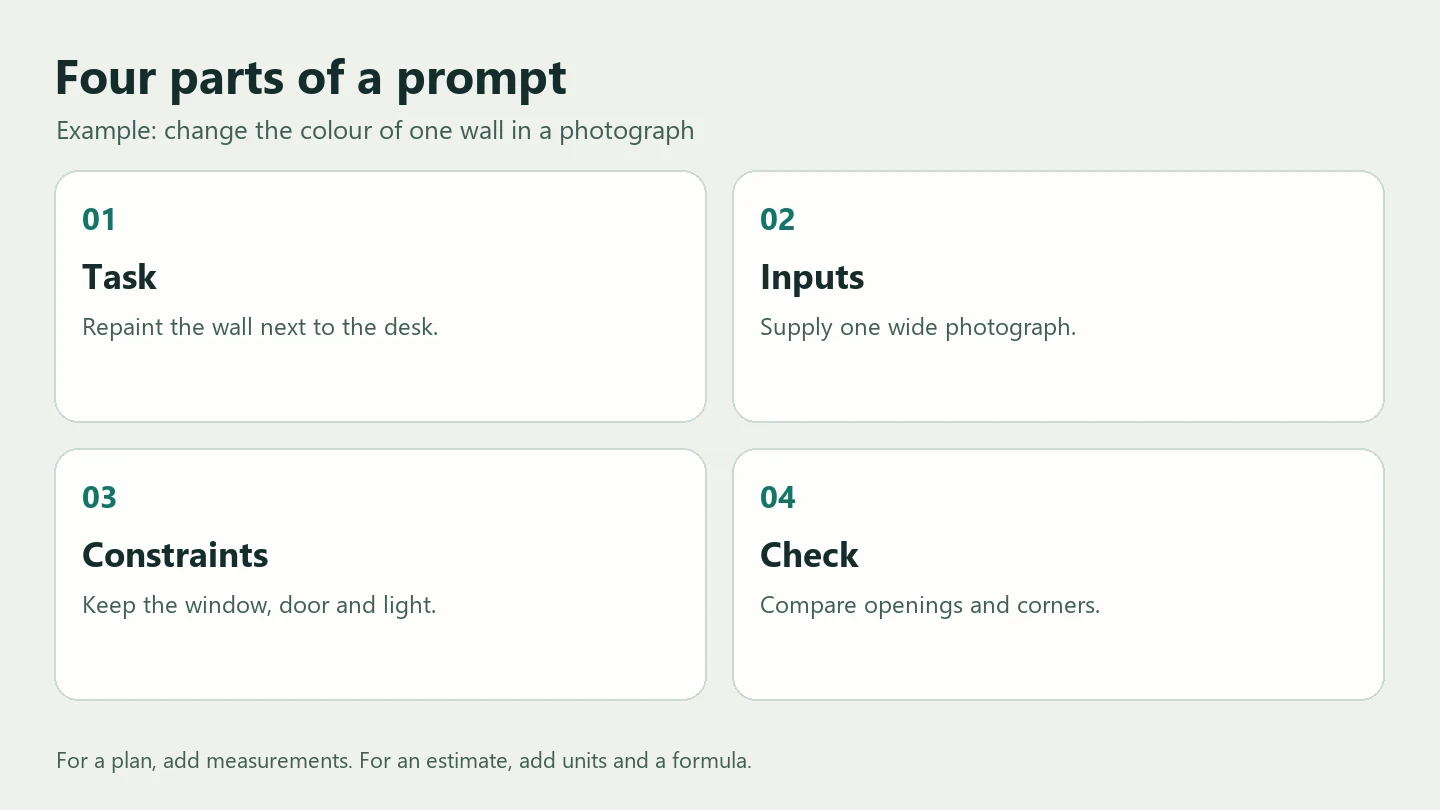
To use AI for room design, floor plans or material estimates, give it the inputs, tell it what needs to stay fixed and specify how you will check the result. A room photo and a clear request can get you started with visual ideas. Furniture layouts need measured dimensions. Material estimates need areas, units and manufacturer data. These 12 copy-ready prompts cover all three.
Start wherever you are in the process. Use prompt 3 if you still need to measure the room, prompt 5 to try a new colour on one wall, or prompt 11 if you already have quotes from contractors.
How to write a prompt you can verify
Replace the words in brackets with your project information. Start by asking the model to list the inputs it found and the ones still missing. This helps you catch an exterior dimension treated as an interior measurement or metres read as millimetres. In an image generator, describe the viewpoint and visible features. In a chatbot that accepts documents, request page references and dimension lines. See SketchUp’s AI Render prompt guidance for examples of visual instructions.
1–3. Write the brief and collect measurements
1. Turn a wish list into a brief
What you need. The room type, who uses it, their priorities and a spending limit.
Help me write a brief for [room]. It is used by [who, when and for what]. The budget is [amount, currency and what is covered]. Ask up to six questions whose answers would change the design. Then sort the requirements into essentials, preferences and unknowns. Flag choices the rest of the household needs to agree on.
Check. Make sure the brief says whether furniture and labour are included, when the room is needed and who makes the decisions.
2. Compare two ways of using the same room
What you need. A daily schedule, fixed elements and competing priorities.
Give me two ways to use a [dimensions] room where I [work by day] and [unwind at night]. Keep the existing [door, radiator and desk]. Compare use of space, glare on the screen, ways to stow work equipment and costs. Suggest one change I can try before buying anything.
Check. Move a chair into the proposed spot or mark the desk footprint with tape. Walk your regular route and use the actual screen to check glare.
3. Prepare photos and a measurement sheet
What you need. A room sketch or photos with personal details removed.
Make a short measuring plan for [room]. Suggest two useful viewpoints and list what to measure separately: walls, height, openings, offsets from corners and visible services. Return a table with element, measurement in mm, where to measure and photo reference. Leave all dimensions blank.
Check. Record the surfaces between which you measured. For furniture in an alcove, take measurements in several positions. Keep the width of the opening separate from the width of the door leaf.
4–6. Work with photos and visual concepts
4. Make two interior concepts from one photo
What you need. One wide photo and two specific aims.
Use this image as the starting point. Create two separate options: [bright workspace] and [quiet reading area]. Keep the viewpoint, window, door, radiator and wall geometry. Change only loose furniture, fabrics and lighting fixtures. Use the same time of day in both. List the changes shown in each image.
Check. Compare corners and openings with the original. If the geometry changed, retry with a mask around the edit area or use the image as a mood reference.
5. Change just one wall
What you need. The source image. If your tool supports masks, select the desk-side wall.
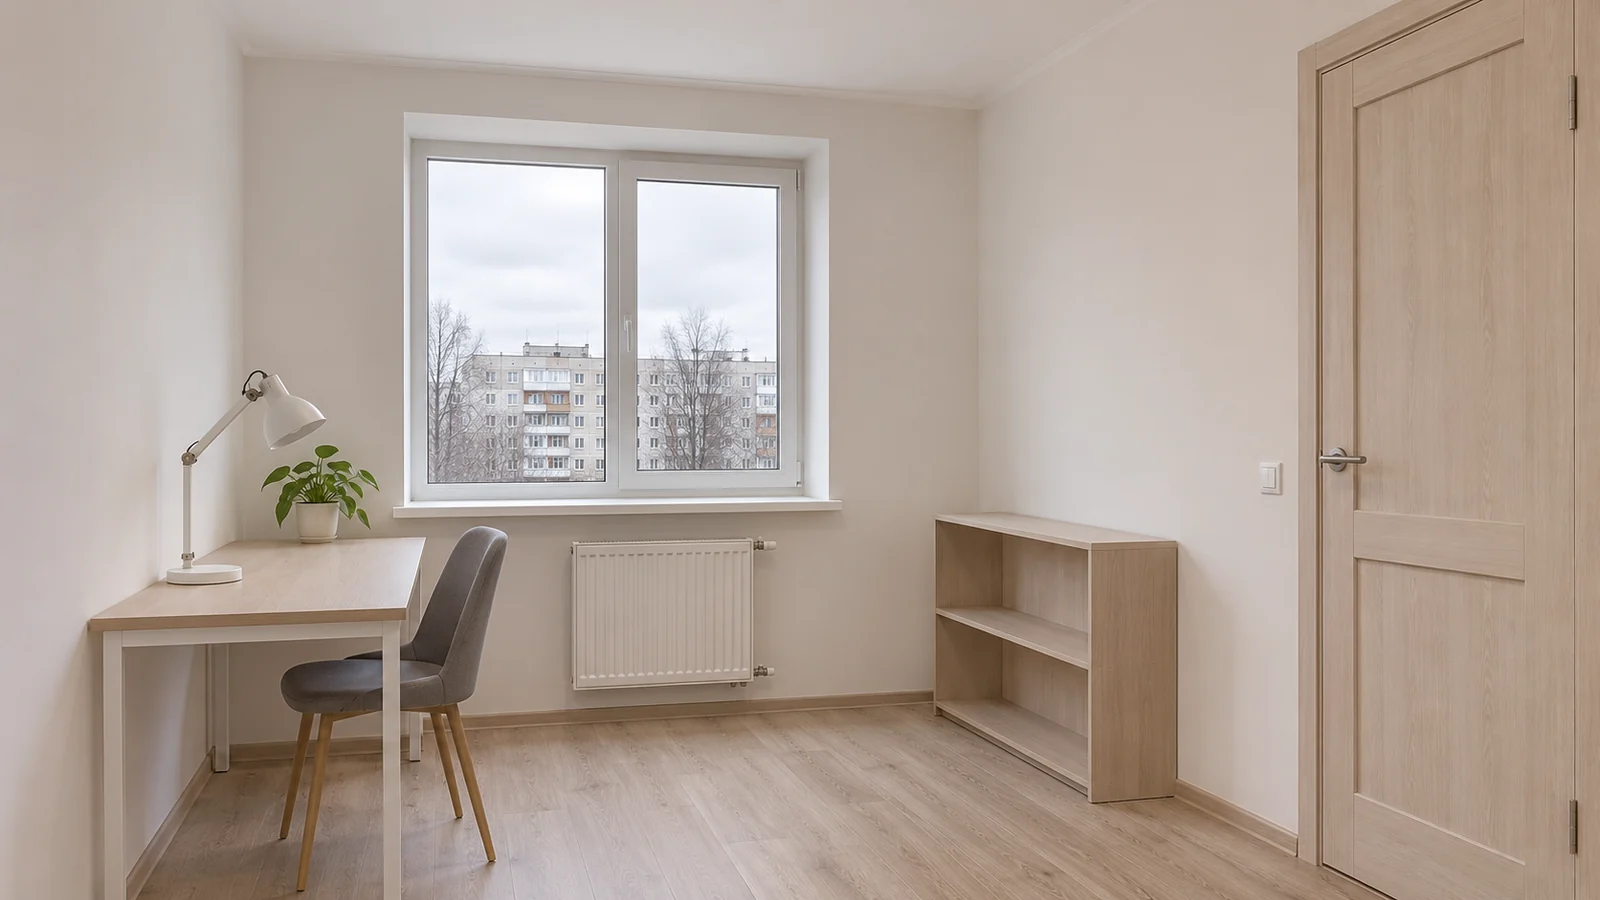
Repaint only the left wall beside the desk in muted sage green. Preserve the white wall around the window, lamp, desk, floor, radiator, door, viewpoint and daylight. Give me one version to compare with the source image.

What happened. ImageGen turned the left wall green. Both versions still show the same main reference points: window, radiator, desk and door. There are small differences around objects and shadows. The result helps compare the mood. Choose paint by testing a physical sample on the wall in daylight and after dark.
6. Compare two finishes in the same light
What you need. A photo, the target area and two real material samples or photos of them.
Show [finish A] and [finish B] on the same surface. Keep the viewpoint, daylight and adjacent materials consistent between images. Identify what I can compare in the images and what needs a sample or a product data sheet.
Check. Inspect actual colour, sheen, pattern repeats and joints on physical samples. Use the specified product’s documentation for cleaning and moisture resistance.
7–9. Read drawings and check furniture layouts
7. Extract dimensions from a floor plan
What you need. A legible PDF or scan with the sheet number and revision date.
Make a table with element, value, unit, page and location of the dimension line. Record only numbers visible on the drawing and mark illegible or missing ones as “check required”. Reconcile the overall dimension with the chain of partial dimensions. Show any discrepancies.
Check. Locate the key numbers in the original yourself. The AECV-Bench study found that interpreting construction drawings and counting elements remain challenging for multimodal models. For a poor scan, try a magnified crop and recheck the result.
8. Check whether the furniture fits
What you need. A measured plan, furniture sizes and the direction each door opens.
Compare two layouts for [desk, cabinet and chair]. Use millimetres. Give offsets from two walls, the narrowest point on the route through the room, and the space needed to pull out the chair and open drawers. Look for conflicts with the door swing, radiator, outlet and usual walking route. Ask for any dimension you need.
Check. Transfer the proposal to a scaled plan. Include the handles and the full depth of open drawers. If the room has accessibility requirements, arrange a professional review.
9. Find conflicts between plan, section and schedule
What you need. Current sheets with numbers and revision dates. Redact confidential details before uploading.
Cross-check the [door, ceiling or finish] references across the plan, section and schedule. Return discrepancies only. For each one give both sheet or row references, the potential effect on ordering and a question for the responsible professional. Flag documents from different revisions.
Check. Keep both source sheets open. A code can refer to a changed detail in a new revision. Refer structural and building services decisions to the relevant professional.
10–12. Estimate materials and prepare contractor questions
10. Estimate how much wall paint you need
What you need. Room dimensions, openings, number of coats, the paint’s spreading rate and an allowance.
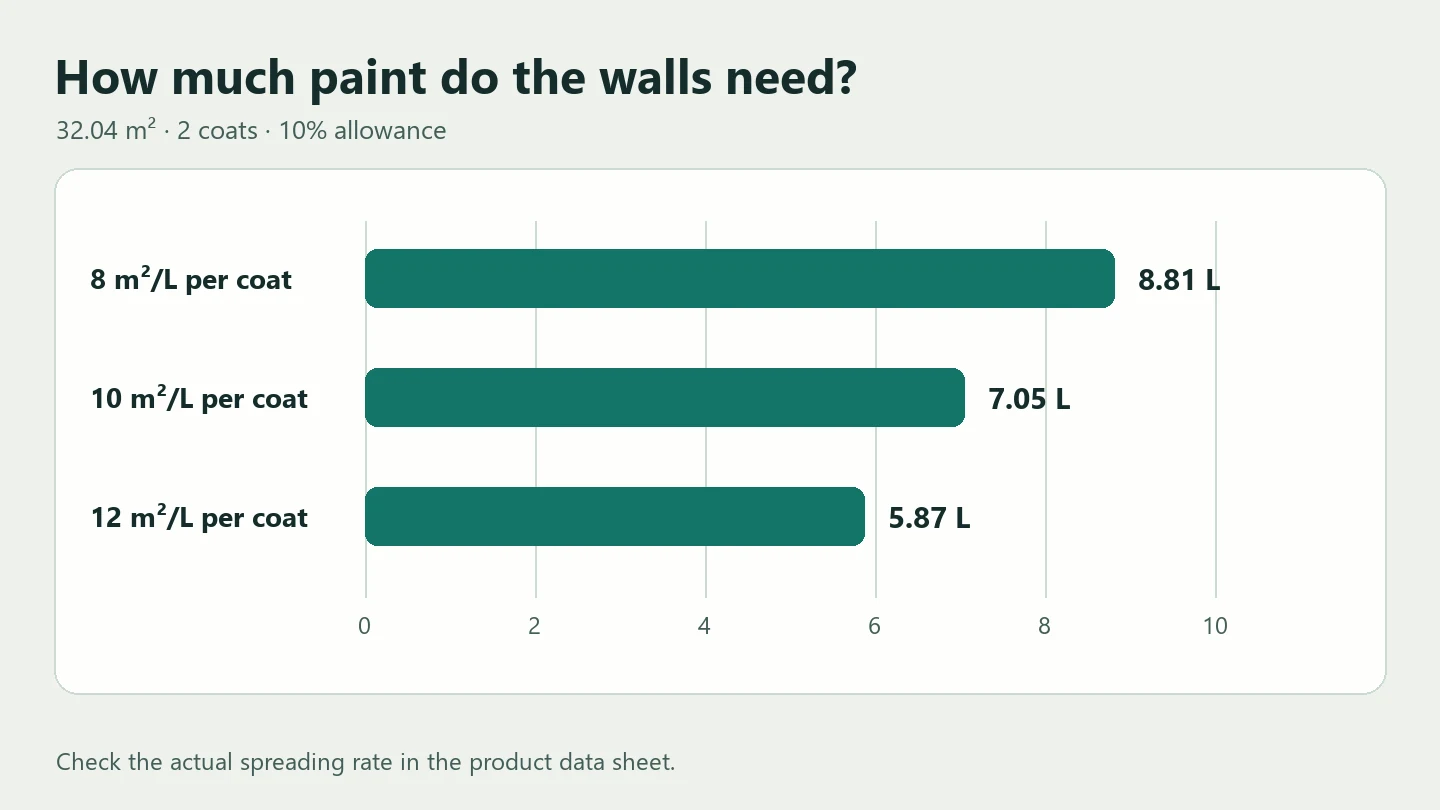
For a rectangular room [length × width × height, m], calculate the wall area. Deduct [openings, m]. Apply [number] coats, [m²/L per coat] and [allowance, %]. Show the perimeter, gross and net area, formula, litres and units. List the ceiling separately. Suggest pack sizes only after I supply the available sizes.
Worked check. A room of 3.60 × 3.20 m with a height of 2.60 m has 35.36 m² of wall area. A 1.40 × 1.20 m window and a 0.80 × 2.05 m door take up 3.32 m². That leaves 32.04 m². With two coats, coverage of 10 m²/L per coat and a 10% allowance, the estimate is 7.05 L, rounded. Estimate reveals, the ceiling and primer separately if they are in scope. Check the spreading rate on the product data sheet. The Dulux paint calculator also uses dimensions and the number of coats.
11. Compare two contractor quotes
What you need. Two quotes, their dates and currencies, and the intended scope.
Align the quotations in a table of item, unit, quantity, material, price and whether it is included. List tax, delivery, surface preparation and disposal separately. Mark blank items “clarify” and show conversions for different units. Give me five questions to get both contractors to price the same scope.
Check. Get written confirmation of missing items. Compare totals once you have reconciled the quantities and inclusions.
12. Prepare a review before placing the order
What you need. Measurements, schedules, photos of tricky details and a list of decisions still open.
Prepare a short pre-order review sheet. For each item list the risk, what to check, who confirms it and by when. Put conflicts between documents in a separate list. Prioritise choices that will be hard to change after ordering or installation. Mark anything you cannot assess from the inputs.
Check. Assign a person and deadline to each decision. Keep the approved revision with the order. See the American Institute of Architects’ guidance on professional oversight when using AI.
What to verify before handing over an AI result
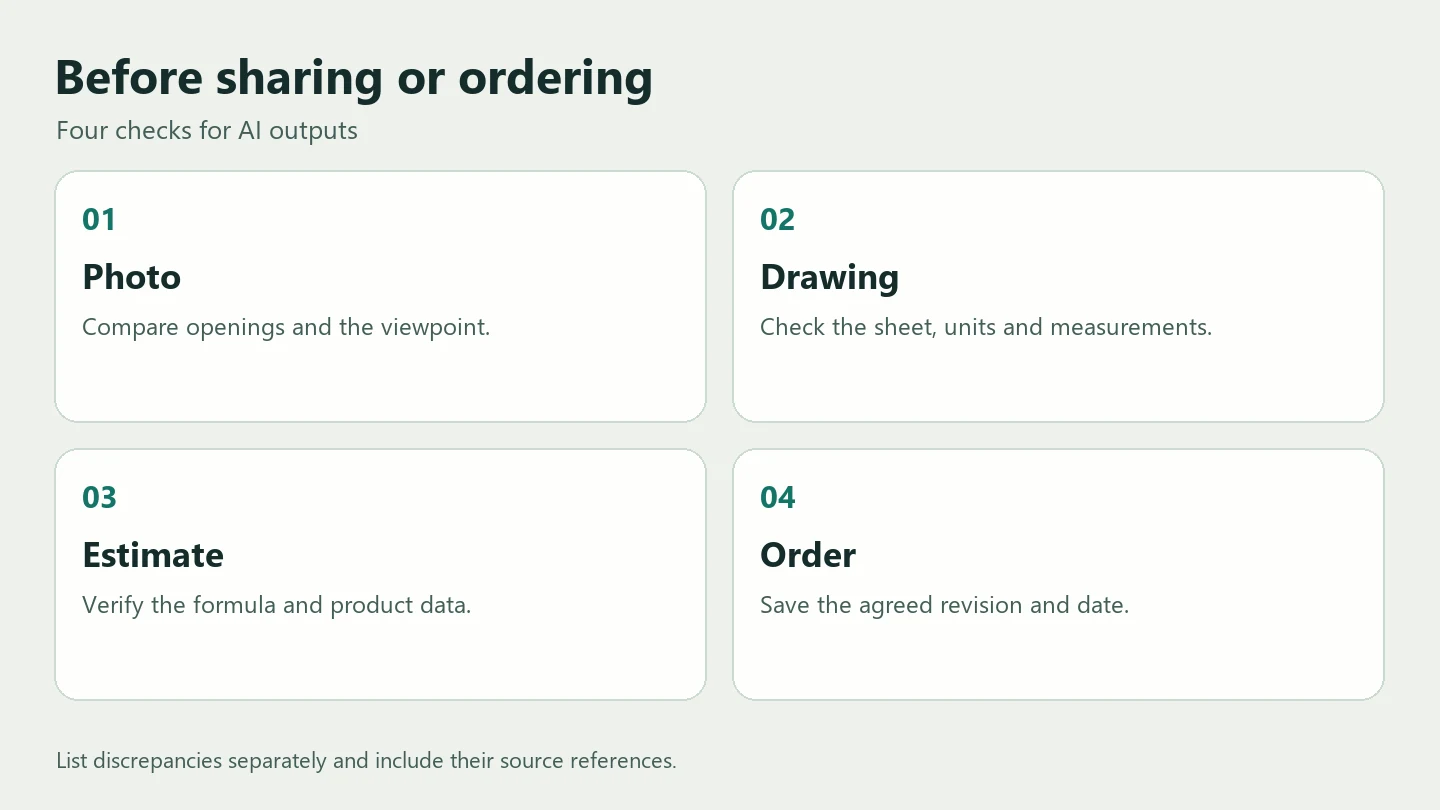
| AI output | Where to verify | What to share |
|---|---|---|
| Visualisation from a photo | Original photo and physical samples | Option and a short list of changes |
| Dimensions from a PDF | Current sheet and actual measurements | A page reference for each number |
| Furniture layout | Scaled plan or room mock-up | Sizes, offsets and opening clearances |
| Quantities or cost comparison | Data sheet, formulas and written quotes | Units, date, assumptions and open questions |
Remove faces and documents from photos and hide addresses and contact details in drawings before uploading. For professional work, check the contract and the service’s data and access settings. The AI in architecture and design guide follows a larger room example through two visuals, measurements and a quantity estimate.
Frequently asked questions
Do I need a different prompt for each AI tool?
You can carry the inputs, constraints and checks across tools. Upload and editing options vary. If the tool only accepts a description, name the visible features. If it offers masks, select the area you want to change.
Can AI make a floor plan from a room photo?
A single image can help generate a rough concept and a measurement list. A scaled drawing needs measured walls, openings and offsets. Check the measurements before ordering furniture or materials, even if the plan looks plausible.
Why does the same prompt give different images?
Generative tools can produce different outputs from the same wording. To compare results, hold the source photo, viewpoint and fixed features constant. Record the model and settings where available.
What can I do if I only have a photo?
Try one change at a time, such as repainting a wall or identifying a workable desk area, or ask for a list of measurements to take. Compare the first result with the source before adding another task.
Related articles
10 Room Measuring Apps for iPhone and Android
Compare 10 room measuring apps in the U.S. stores. Find an AR tape measure, a LiDAR floor plan app or a tool for Bluetooth laser readings.
Tape Measure vs LiDAR: How Far Off Is a Phone Room Scan?
How far off is a phone LiDAR room scan? Compare published dimensions, repeat a three-scan accuracy check and run a separate mirror test.
A Sofa, Bed and Desk in 6 m²? Eight Traps in AI Architectural Renders
A room that looks bigger and a window floating inside a pane. Explore eight AI rendering mistakes, real designers’ examples and checks before you build.