
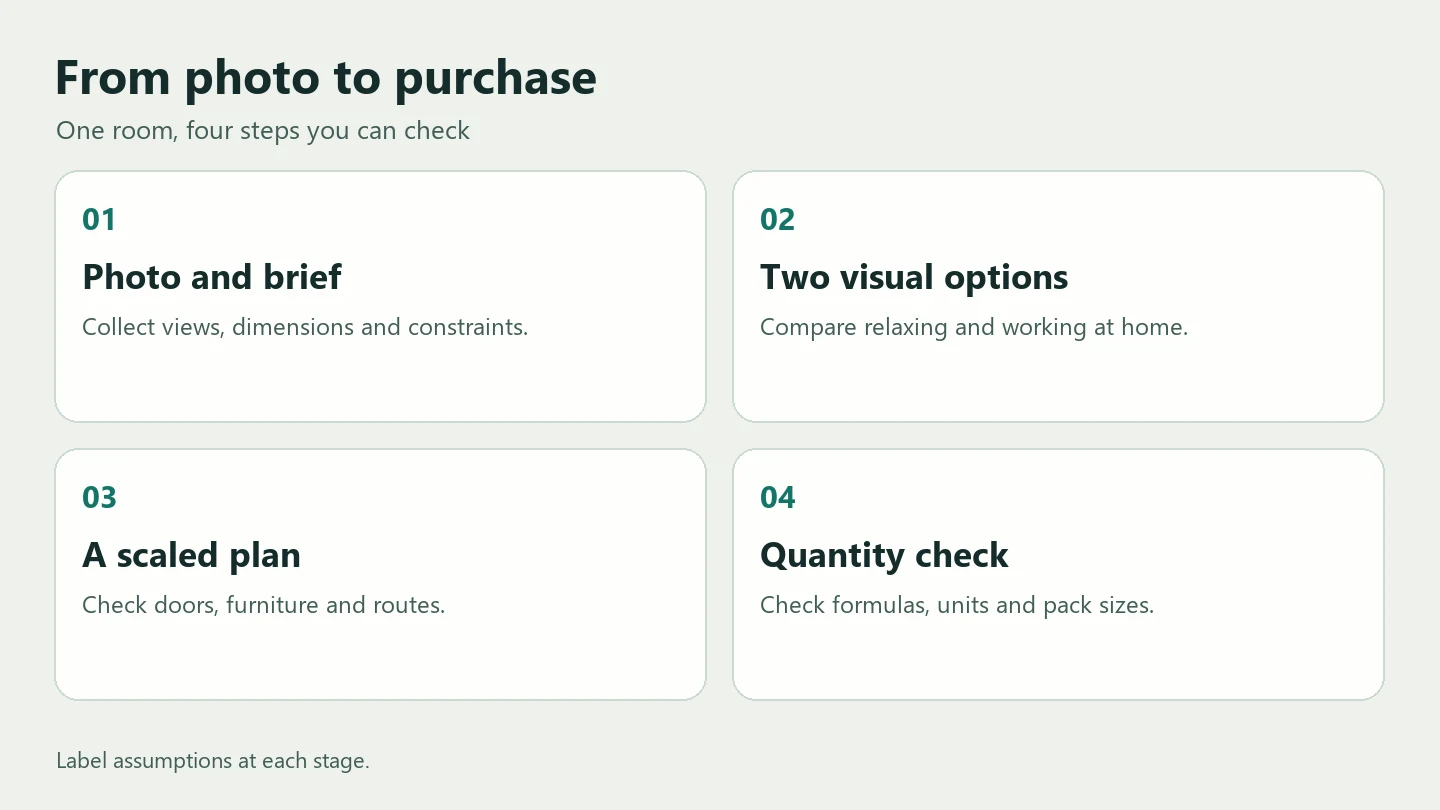
You have a photo of your living room, a sofa you want to keep and a need to work from home. AI gives you two appealing images. One suggests a warm reading corner. The other puts a desk near the window. Before buying anything, ask a question the picture alone cannot answer: can you open the door while the chair is pulled out?
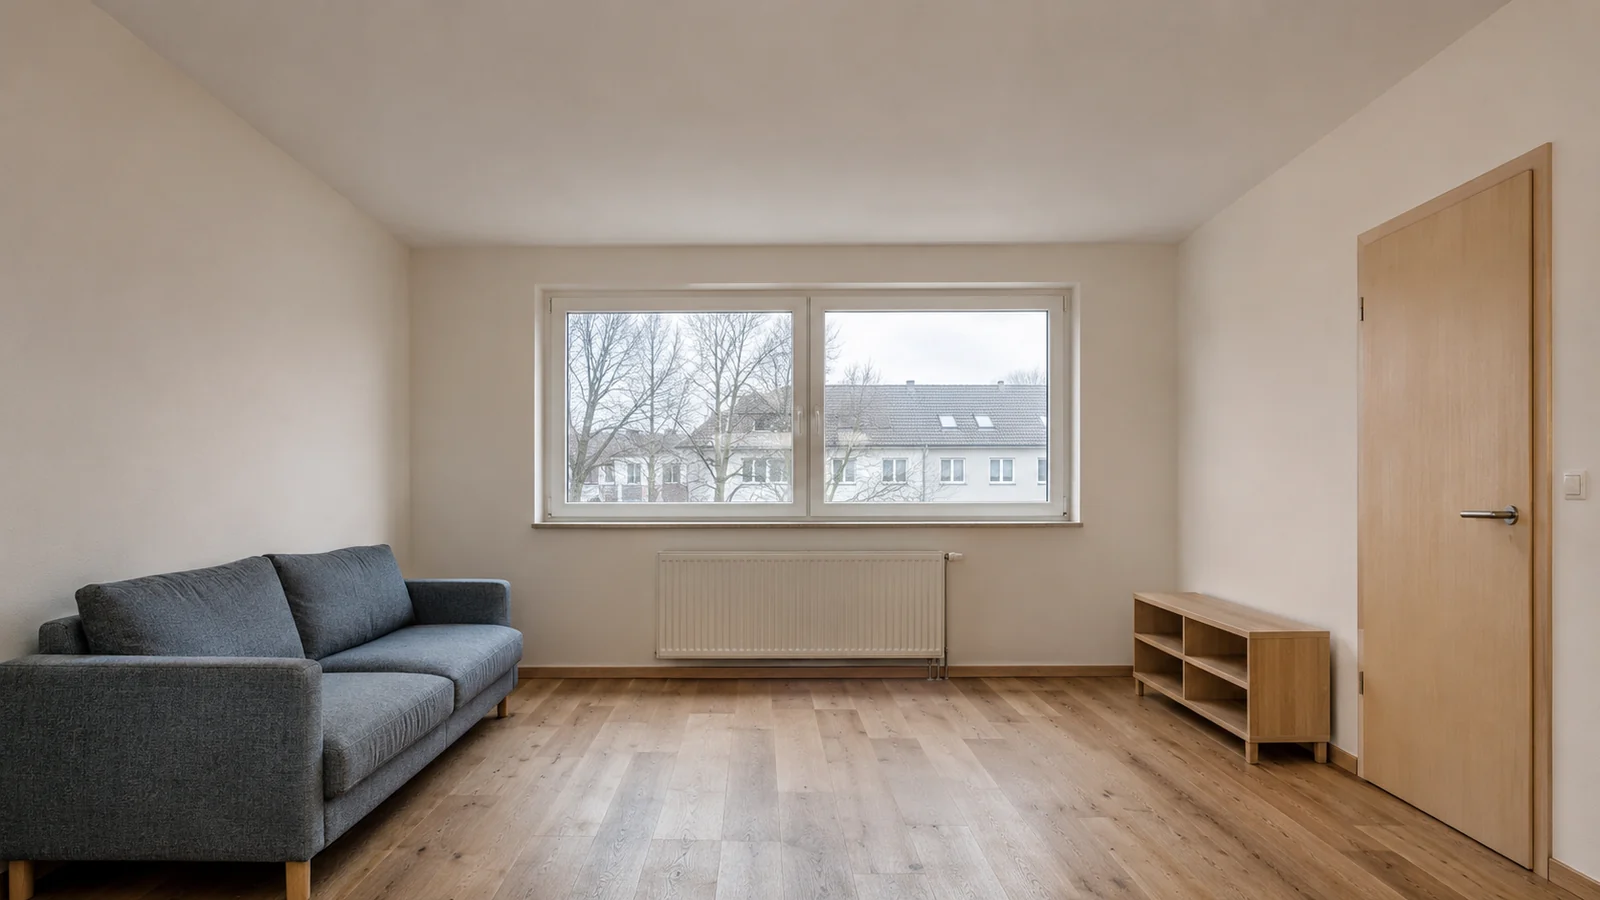
AI can help you write a brief, explore interior options, read a plan and prepare a calculation. Check each output against the right source: measured dimensions for the image, a scaled plan for furniture and circulation, and a formula and product instructions for quantities. This guide walks through all four steps in one room. We generated the starting image and edited it twice. The exercise dimensions come from a separate teaching example.
What AI can do in architecture and interior design
A text assistant can organise a household’s needs and prepare questions for a designer. An image editor helps visualise alternatives. A room planner or CAD model lets you place objects to scale. A spreadsheet shows how quantities were calculated. Each tool produces a different kind of information, and one renovation can use all of them.
In RIBA’s 2026 survey, 74% of responding architecture practices used AI in at least some projects. Among US homeowners who used AI for their project in Houzz’s survey, 64% looked for ideas, 58% visualised concepts and 24% used it for budgeting. For a home project, this suggests a useful sequence: agree on a direction and then check dimensions and costs. RIBA AI Report · Houzz survey
| Task | Useful tool | Check before deciding |
|---|---|---|
| Write a brief | Text assistant | Needs, budget, constraints and unknowns. |
| Compare interior options | Image generator or editor | Viewpoint, openings and objects that should stay in place. |
| Verify that furniture fits | Room planner or CAD | Dimensions, door swings, circulation and access to services. |
| Estimate materials | Formula, spreadsheet and product information | Units, coats, allowance and pack sizes. |
| Assess building performance | Specialist analysis and professional review | Model inputs and the applicable requirements for light, structure or services. |
Step 1. Prepare photos and a brief
Photograph the room from two corners, ideally in daylight. Take a separate picture of any door, radiator or other fixture that affects your decision. Measure the wall lengths, height, openings and their positions. Record each door swing and identify the furniture that will stay. IKEA’s interior design checklist also asks for both photos and a measured plan with openings and fixtures. IKEA measuring and photo guide
Our living room measures 4.80 × 3.60 m, with a ceiling height of 2.65 m, one window and one door. The sofa stays against the left wall. The openings and radiator are fixed. We compare a reading corner used in the evening and a desk for regular home working. For a real room, include who uses it, what they store nearby and where power is available.
Brief prompt
Help me write a brief for a 4.80 × 3.60 m living room used for relaxing and working. Keep the sofa, window, door and radiator. Propose two scenarios and five questions to answer before buying furniture. Mark any missing measurements or details as unknown.
Step 2. Compare two interiors from the same image
We edited the same synthetic starting image twice. The first version adds a floor lamp, a small side table and warmer textiles for reading. The second replaces the low cabinet on the right with a desk, chair and task lamp. In both, the window, radiator and right-hand door remain visible in the same general positions. We compared these features visually. Furniture dimensions come from the plan below.

Photo editing prompt
Keep the camera, wall edges, floor, window, door and radiator. Keep the sofa on the left. Replace the low cabinet on the right with a compact desk, chair and desk lamp. Show one daylight view. Leave access to the door and radiator unobstructed. Keep any area outside the frame outside the frame.
Use the same crop and viewpoint so the comparison is easy to read. Test the furniture position and the finish separately. If your tool supports editing a selected area, limit the change to the part that contains the furniture. Compare the new result with the original and check the window, door, radiator and floor. A small geometric change can matter more than a visually appealing improvement.
Step 3. Draw a measured room plan
The exercise plan uses an internal room size of 4800 × 3600 mm. The 1800 mm window is on the far wall, and the 900 mm doorway is on the right. An arc depicts the inward swing. The sofa is 2100 × 880 mm, and the desk is 1200 × 600 mm. We place the desk beyond the illustrated door swing and show a separate area for the chair. Those dimensions come from the exercise, so you can test whether the layout works independently of the pictures.
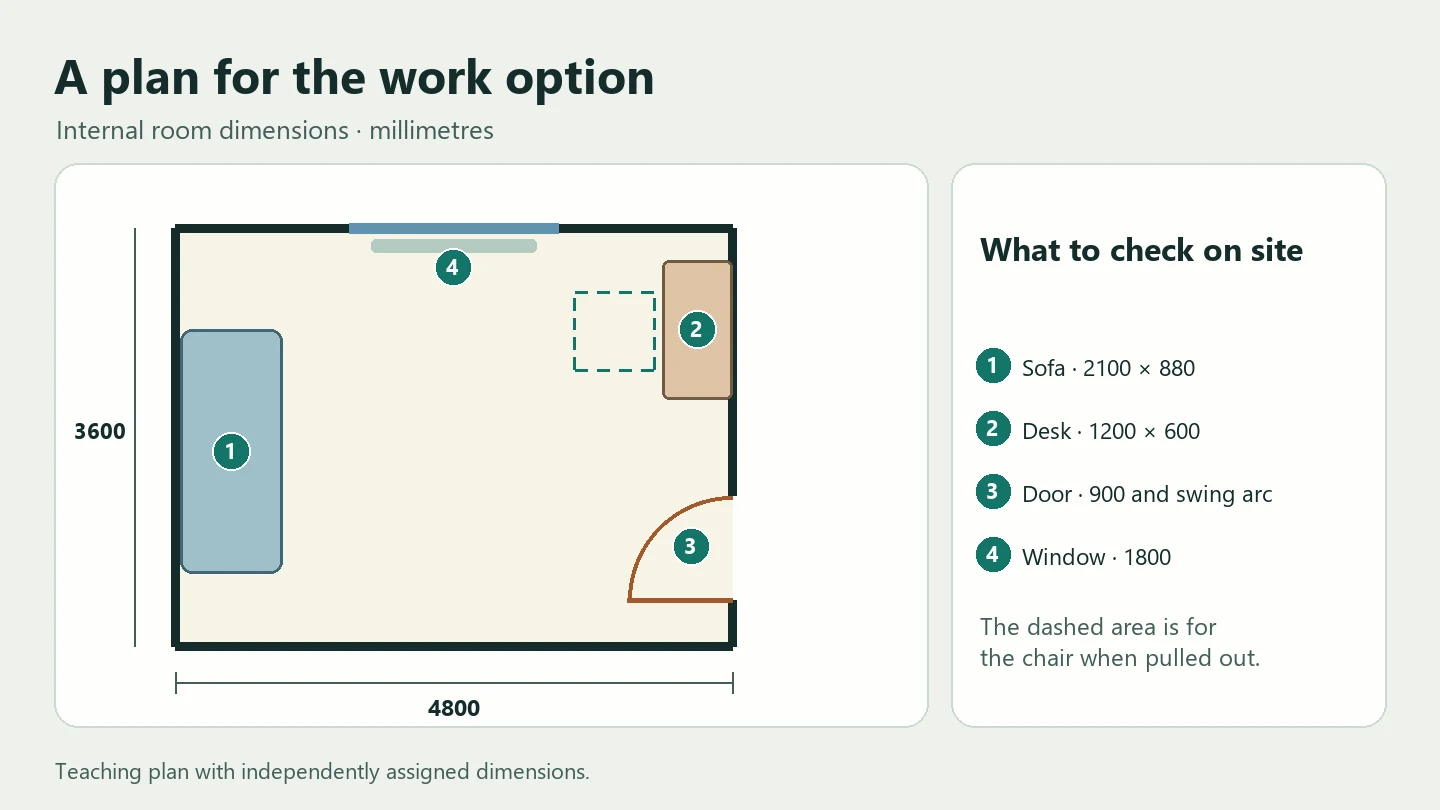
Try three movements: opening the door, pulling out the chair and walking to the window or radiator. In a real room, use masking tape to mark the furniture footprint. Walk the route before ordering. Check power access, the window operation and whether the radiator controls remain reachable. Include fixed features such as skirting, trims or projecting pipes where they affect the furniture.
Measure in a tool that has a known scale. SketchUp, for example, provides a distance tool for model geometry. The AECV-Bench research benchmark tests multimodal models separately on reading drawings, counting elements and interpreting spatial relationships. Apply the same distinction at home: ask the model to show where it found each value and to mark any information it could not read. Measuring in SketchUp · AECV-Bench research
Plan-reading prompt
Read this plan and make a table with the feature, dimension, unit and where the label appears. Mark illegible and missing values. List possible conflicts between furniture, doors and routes for manual checking. Avoid deriving dimensions from pixels unless the scale is confirmed.
Step 4. Calculate paint and flooring quantities
Assume two coats on four walls. Ceiling, reveals and primer are separate. The window measures 1.80 × 1.35 m and the door opening 0.90 × 2.05 m. Use an example spreading rate of 10 m²/L per coat and a 10% allowance. For an actual purchase, check the product’s spreading rate, coats and substrate preparation, which can vary with the paint and surface. Dulux calculation method · Example product data sheet
| Quantity | Calculation | Result |
|---|---|---|
| Floor area | 4.80 × 3.60 | 17.28 m² |
| Perimeter | 2 × (4.80 + 3.60) | 16.80 m |
| Gross wall area | 16.80 × 2.65 | 44.52 m² |
| Window and doorway | 1.80 × 1.35 + 0.90 × 2.05 | 4.275 m² |
| Net wall area | 44.52 − 4.275 | 40.245 m² |
| Paint with allowance | 40.245 × 2 ÷ 10 × 1.10 | ≈ 8.85 L |
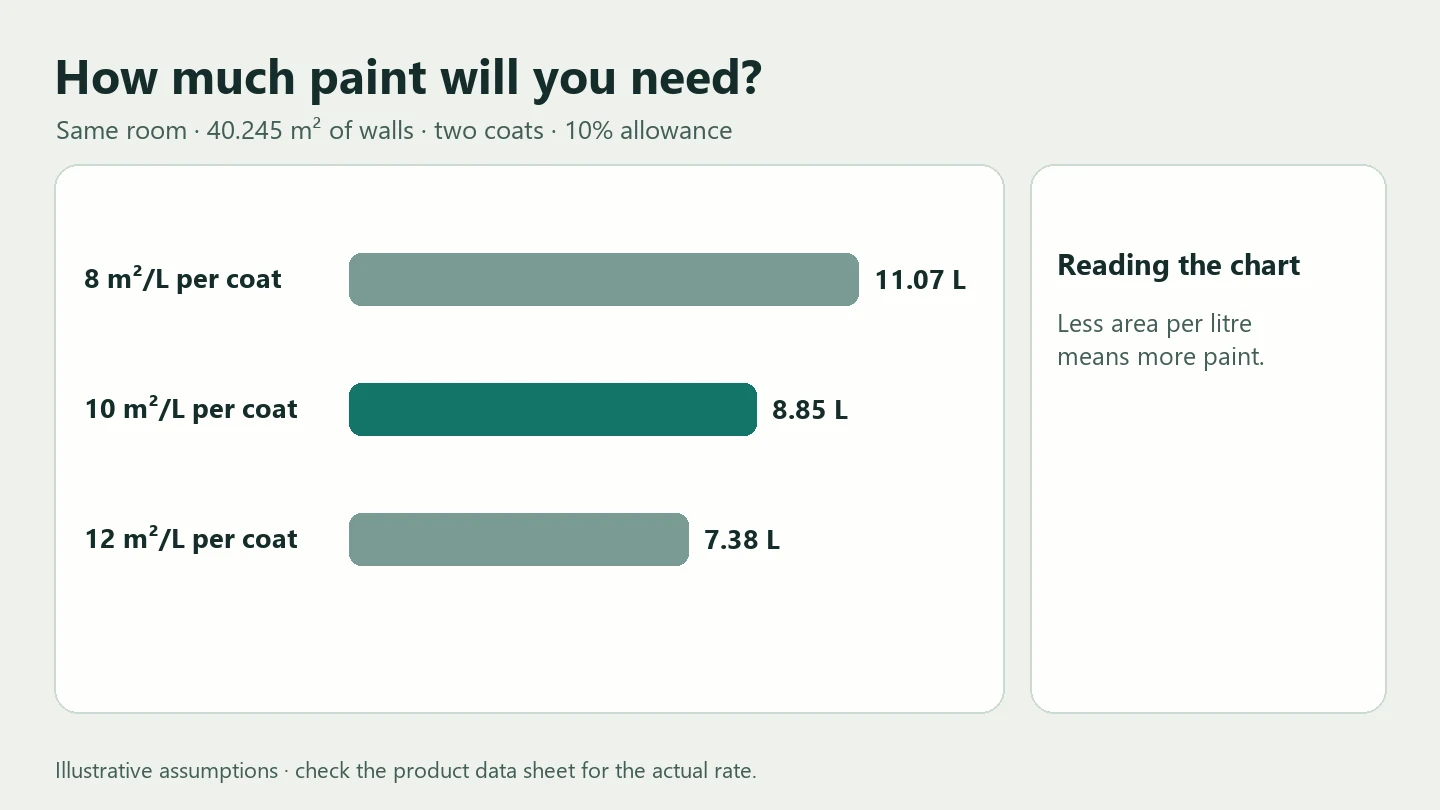
Check the units. A spreading rate in m²/L tells you how much area a litre covers, so divide the area for the coats by that rate. If the product instead gives L/m², multiply by the consumption rate. Apply the allowance and round to available packs at the end. Calculate primer and any additional surfaces separately using the assumptions that apply to them.
For flooring, an illustrative 7% allowance gives 17.28 × 1.07 ≈ 18.49 m². If a pack covers 2.20 m², that means 9 packs, or 19.80 m². This demonstrates rounding up. Actual allowances depend on layout, cuts and product instructions. A suspended ceiling has its own layout inputs, including orientation, modules and components. Mehbud ceiling calculator in Ukrainian
Calculation prompt
Calculate the net wall area and paint quantity. The room is 4.80 × 3.60 × 2.65 m, with a 1.80 × 1.35 m window and a 0.90 × 2.05 m doorway. Subtract both openings. Use two coats, 10 m²/L per coat and a 10% allowance. Show formulas, units and intermediate values. Recalculate for 8 and 12 m²/L without rounding the intermediate steps.
Turn comfort into something you can test
Sit where the desk would go and check the screen in daylight. Can you talk on a call without disturbing someone on the sofa? At night, sit where you would read. Does the lamp light the page, and how much sound comes from the corridor? These questions make comfort specific to a person, place and task. A warm-looking render is a useful idea to test in the room. Neuroarchitecture and testing spaces
Requests about daylight, heating, ventilation or acoustics need their own inputs and methods. Autodesk Forma, for example, offers separate tools for early daylight and noise analysis. The inputs and model define what each result can tell you. This example checks chosen geometry and arithmetic. Use a qualified local professional where a change affects the structure or shared services. Autodesk Forma analysis guide
A checklist before ordering
- Agree on what will change and what will stay.
- Confirm wall lengths, openings, furniture and routes on site.
- Keep the reference photo, measured plan and selected option together.
- Recalculate quantities and allowances before rounding to packs.
- Ask a qualified designer about work affecting structure or shared services. Related guide to checking AI renders
Frequently asked questions
Can AI design a room from one photograph?
It can create visual options for discussion. Add other views and measured dimensions to check what the first picture cannot show.
Which AI tool is best for architecture?
Choose the tool based on the task. For visuals, test whether it preserves the viewpoint and fixed features. For plans, check where dimensions come from. For quantities, check the calculation against known inputs. Compare tools with the same brief and reference files.
Why do paint calculators give different answers?
They may assume different spreading rates, coats, openings or allowances. Check those assumptions, then round to the packs you can buy.
Related articles
CADCraft vs FreeCAD: Differences, Trade-offs and When AutoCAD Fits
Compare CADCraft, FreeCAD, AutoCAD and AutoCAD LT. Follow one plate from 2D drafting and DWG exchange to a parametric solid and animation.
CADCraft: Testing DXF and DWG With a Mounting Plate
A hands-on test of CADCraft 0.20.1. Draft a mounting plate, inspect the workspace and verify what survives DXF to DWG conversion.
Why It’s So Easy to Get Lost in a Shopping Mall
Why malls can be hard to navigate, where signs work best and how to test a route. Includes two floor-plan diagrams, research and a short animation.